Leaderboard
-

CodeExplorer
Team Retired102Points4,749Posts -

dawwinci
Full Member28Points78Posts -

whoknows
Full Member+22Points2,034Posts -

Jasi2169
Full Member17Points246Posts
Popular Content
Showing content with the highest reputation since 06/26/2026 in all areas
-

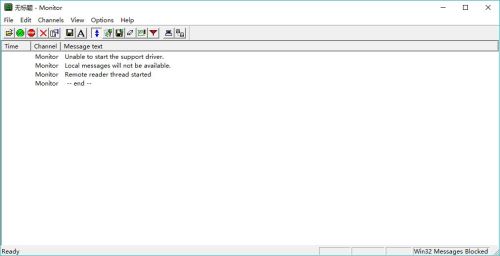 DriverMonitor Enhanced Edition (Alpha) Enhance - 1 - Support for file dragging operations has been implemented, allowing direct setting of the path for the corresponding driver file. - 2 - Drag-and-drop operation compatible with administrator mode has been implemented. - 3 - Folder directory redirection in 64-bit environment has been disabled. Modified by boot @ tuts4you Date July 6, 20262 points
 -
 2 points
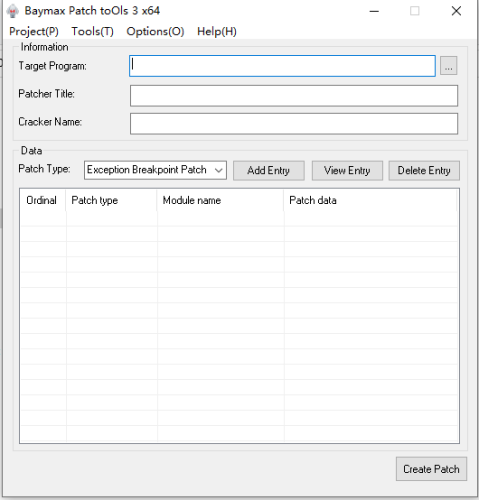 Latest release (3.5.1.7) with tuts/videos re-uploaded (English docs under release folders). I hope these will help (sorry, I cannot translate from Chinese 🥺) --> Download2 points
 -
 1 pointA collection of tutorials aimed particularly for newbie reverse engineers. 01. Olly + assembler + patching a basic reverseme 02. Keyfiling the reverseme + assembler 03. Basic nag removal + header problems 04. Basic + aesthetic patching 05. Comparing on changes in cond jumps, animate over/in, breakpoints 06. "The plain stupid patching method", searching for textstrings 07. Intermediate level patching, Kanal in PEiD 08. Debugging with W32Dasm, RVA, VA and offset, using LordPE as a hexeditor 09. Explaining the Visual Basic concept, introduction to SmartCheck and configuration 10. Continued reversing techniques in VB, use of decompilers and a basic anti-anti-trick 11. Intermediate patching using Olly's "pane window" 12. Guiding a program by multiple patching. 13. The use of API's in software, avoiding doublechecking tricks 14. More difficult schemes and an introduction to inline patching 15. How to study behaviour in the code, continued inlining using a pointer 16. Reversing using resources 17. Insights and practice in basic (self)keygenning 18. Diversion code, encryption/decryption, selfmodifying code and polymorphism 19. Debugger detected and anti-anti-techniques 20. Packers and protectors : an introduction 21. Imports rebuilding 22. API Redirection 23. Stolen bytes 24. Patching at runtime using loaders from lena151 original 25. Continued patching at runtime & unpacking armadillo standard protection 26. Machine specific loaders, unpacking & debugging armadillo 27. tElock + advanced patching 28. Bypassing & killing server checks 29. Killing & inlining a more difficult server check 30. SFX, Run Trace & more advanced string searching 31. Delphi in Olly & DeDe 32. Author tricks, HIEW & approaches in inline patching 33. The FPU, integrity checks & loader versus patcher 34. Reversing techniques in packed software & a S&R loader for ASProtect 35. Inlining inside polymorphic code 36. Keygenning 37. In-depth unpacking & anti-anti-debugging a combination packer / protector 38. Unpacking continued & debugger detection by DLL's and TLS 39. Inlining a blowfish scheme in a packed & CRC protected dll + unpacking Asprotect SKE 2.2 40. Obfuscation and algorithm hiding1 point
 -
 1 point
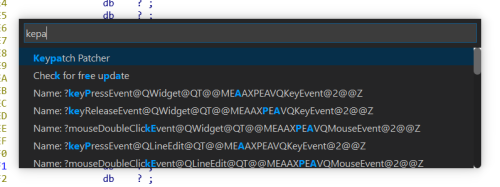 IDA Palette (or its project name: ifred) is a plugin which provides fast search on IDA Pro's commands/menu items or searches through its strings output! This plugin provides 2 keyboard shortcuts: Ctrl + P : Searched through IDA's commands Ctrl + Shift +P : Searched through IDA's string output1 point
 -
1 point
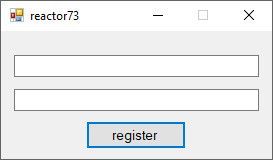 File protected by .NET Reactor v7.3 having /Code Virtualization/ enabled. By nature the application using /Dependency Injection/, the 3rd party files embedded to main exe (see shot2). Find registration combination and reply it with the success message!1 point
 -
The Hex-Rays Decompiler plugin for better code navigation in RE process. CodeXplorer automates code REconstruction of C++ applications or modern malware like Stuxnet, Flame, Equation, Animal Farm ... Features: Automatic type REconstruction for C++ objects. To be able to reconstruct a type using HexRaysCodeXplorer one needs to select the variable holding pointer to the instance of position independed code or to an object and by right-button mouse click select from the context menu «REconstruct Type» option. Virtual function table identification - automatically identifies references to virtual function tables during type reconstruction. When a reference to a virtual function table is identified the plugin generates a corresponding C-structure. As shown below during reconstructing struct_local_data_storage two virtual function tables were identified and, as a result, two corresponding structures were generated: struct_local_data_storage_VTABLE_0 and struct_local_data_storage_VTABLE_4. C-tree graph visualization – a special tree-like structure representing a decompiled routine in citem_t terms (hexrays.hpp). Useful feature for understanding how the decompiler works. The highlighted graph node corresponds to the current cursor position in the HexRays Pseudocode window Ctree Item View – show ctree representation for highlighted element Extract Types to File – dump all types information (include reconstructed types) into file. Navigation through virtual function calls in HexRays Pseudocode window. After representing C++ objects by C-structures this feature make possible navigation by mouse clicking to the virtual function calls as structure fields Jump to Disasm - small feature for navigate to assembly code into "IDA View window" from current Pseudocode line position. It is help to find a place in assembly code associated with decompiled line. Object Explorer – useful interface for navigation through virtual tables (VTBL) structures. Object Explorer outputs VTBL information into IDA custom view window. The output window is shown by choosing «Object Explorer» option in right-button mouse click context menu Support auto parsing RTTI objects This plugin is recompiled by disauto UPDATE 29.10.2024 Recompiled for IDA Pro v9.0 Windows x86_641 point
-
 1 point
 -
1 point
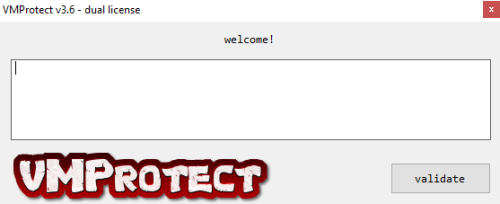 Hi all, This is a protected with the RETAIL edition... Mutation / Virtualization w/ the built in VMProtect license system. There are 2 enter serial dialogs, once you solve the 1st, drives you to 2nd, when a valid serial entered exporting a file... If a valid serial entered on 1st form, is saved to license.diz file.1 point
 -
 1 point
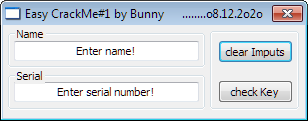 Only simple algorithms - for one name one key. Provide a valid pair of name and serial, or write a keygen. Good luck.1 point
 -
Sometimes crackme's or something you might be reversing will constantly bug you due to excessive usage of F7 & F8. It will be quite neat if you can see how the application is executing visually and set you breakpoints accordingly. I know stuff like offensivecomputing.net VERA exists but most of the time it crashes. Here is my attempt and I hope you find it useful.1 point
-
1 pointThe idea for this project was to provide a means of publication for interesting articles. Not everyone likes to write tutorials, and not everyone feels that the information they have is enough to constitute a publication of any sort.We all run across interesting protections, new methods of debugger detection, and inventive coding techniques.We just wanted to provide the community with somewhere to distribute interesting, sometimes random, reversing information. While the title of this ezine says ARTeam, we prefer to think that we are acting as a conduit. We really hope that you find this project interesting, and we really want this to be a community project. So if you have an idea for an article, or just something fascinating you want to share, let us know and hopefully we will see a ezine #. It soon became apparent that the scope of this project went well beyond what we had predicted. A big thanks goes out to all the contributors. Without you this would be a blank page. We also need to thank everyone who has viewed, refined and commented on the production of this ezine. Hopefully we have been able to provide the reversing community something interesting. The reversing community has been very dynamic in the past few years. We've seen a ring GUI debugger grow in startling popularity. We've seen protection authors dig deeper into the OS in an effort to deter crackers. Unique protections have provided months of analysis for reversers. New inventive tools have been developed in the re-versing community in an effort to effectively analyze and understand software protection. And ironically we see some of these tools move back to ring0. None of these changes and achievements would have been possible without the amazing and talented reversers that take the time to share their knowledge and teach others. No matter what team you belong to, what level you reverse at, what language you speak, you all make up the same community. A group of people who constantly strive for discovery. None of us are content with accepting things "as they are" we need to know why. We are the scientists of software. We dig deeper than the average user, we see code where everyone else see flashy presentation. We learn this code so well that we can rewrite it, manipulate it, and even improve on it. Since these are my thoughts, I just want to thank every single member of the reversing community. I couldn't even begin to name every single person who has provided a contribution. We are all spread out among many boards, many teams, even many countries. But I like to think that we all share a certain camaraderie. Please enjoy the information included among these pages, we had some talented people give us some great sub-missions.1 point
-
 1 pointOllyICE patched to work with TheMida, this was made by the prestigious team SnD member EvOlUtIoN. This debugger took me a long time to find on the net and since most of the links that were on the net were dead it took me like around 3 weeks to find. I hope you guys enjoy. QUOTE BY EvOlUtIoN: So, by popular demand here is the debugger I normally use to "play" with programs protected with TheMida / WinLicense. My patch is very simple but it is good to remember that OllyICE was created for the first time since Hachno, a guru when it comes to Armadillo and unpacking in general. This version has basically 2 patches that differ from the normal OllyICE: One. We do not crash when you load a file protected 2. If you add a context menu creates an entry called "TheMida OllyDbg", so depending on the target, you can open a olly or another. In the plugin folder there are all those necessary, the most important are: 1. PHANTOM plugin 2. HideOD Without these you do not ever riusicrà to load a target with TheMida without being detected. In addition there are 2 scripts, neither Dumpa the VM but at least find the OEP and aaggiustano the IAT.1 point